

Build Your Own Smart Battery Box: Power Storage Made Simple
Transform your existing solar setup into a reliable backup power system with a DIY smart battery box – a cost-effective alternative to commercial home battery storage solutions. This customizable power station combines lithium batteries, smart monitoring systems, and protective circuitry to create a robust energy storage solution tailored to your specific needs.
Building your own battery box not only saves thousands compared to pre-built systems but also provides complete control over capacity, charging parameters, and integration with home automation systems. With proper planning and safety measures, a DIY battery box can power essential appliances during outages, store excess solar production, and even participate in utility demand response programs for additional savings.
This comprehensive guide walks through selecting appropriate components, assembling safe electrical connections, and implementing smart monitoring features that protect your investment while maximizing its efficiency. Whether you’re looking to expand an existing solar setup or create a standalone backup power solution, a custom battery box offers unmatched flexibility and value for Illinois homeowners.
Smart Battery Box Basics
Essential Components
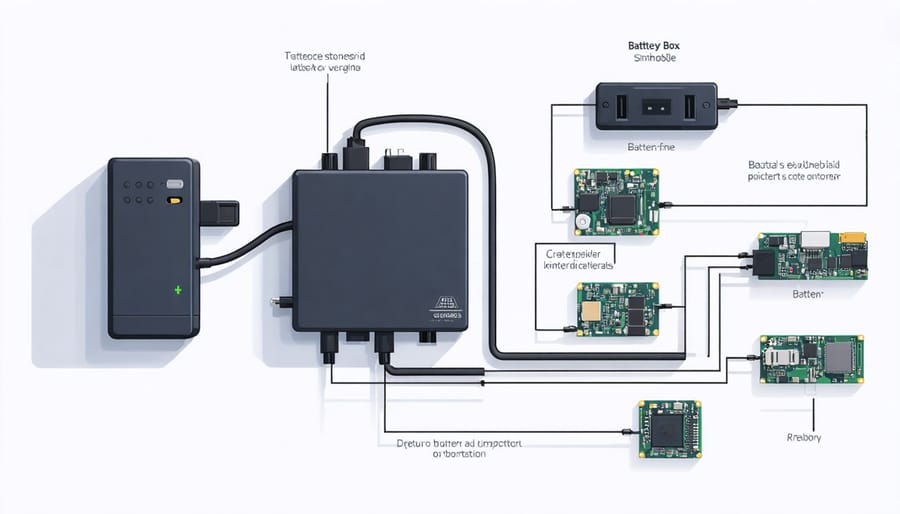
To build a smart battery box, you’ll need several key components that work together to create a safe and efficient energy storage system. The main component is a deep-cycle battery, preferably a lithium-ion or LiFePO4 type, which offers better performance and longevity than traditional lead-acid batteries.
Essential equipment includes a battery management system (BMS) to monitor voltage, temperature, and charging status. You’ll also need a smart charge controller to regulate power flow and protect your battery from overcharging. For monitoring capabilities, incorporate a WiFi-enabled monitoring module or smart meter.
For construction, gather these materials:
– Weather-resistant enclosure box
– Battery terminals and cables
– Circuit breakers or fuses for protection
– Ventilation components
– Temperature sensors
– Insulation material
– Mounting hardware
For tools, you’ll need:
– Wire strippers and crimpers
– Multimeter
– Basic hand tools (screwdrivers, wrenches)
– Power drill
– Safety equipment (gloves, safety glasses)
Remember to choose components rated for your specific power needs and ensure all materials meet local electrical codes and safety standards.
Safety Considerations
When working with batteries, safety must be your top priority. Always install your battery box in a well-ventilated area away from direct sunlight and moisture. The enclosure should be made of fire-resistant materials and include proper thermal management features to prevent overheating.
Install appropriate fusing and circuit protection devices to guard against short circuits and overcharging. Use properly rated cables and connectors, and ensure all connections are secure and properly insulated. Keep a Class C fire extinguisher nearby, as it’s specifically designed for electrical fires.
Never mix different battery types or ages in the same system, as this can lead to dangerous charging imbalances. Install battery monitoring systems to track temperature, voltage, and current levels. These systems should include automatic shutoff features for emergencies.
Wear appropriate personal protective equipment when handling batteries, including safety glasses and insulated gloves. Keep metal tools away from battery terminals to prevent accidental shorts. Have an emergency response plan ready, and ensure family members know how to shut down the system safely if needed.
Label all components clearly and maintain proper documentation of your setup for future reference or emergency situations.
Building Your Smart Battery Box
Box Construction
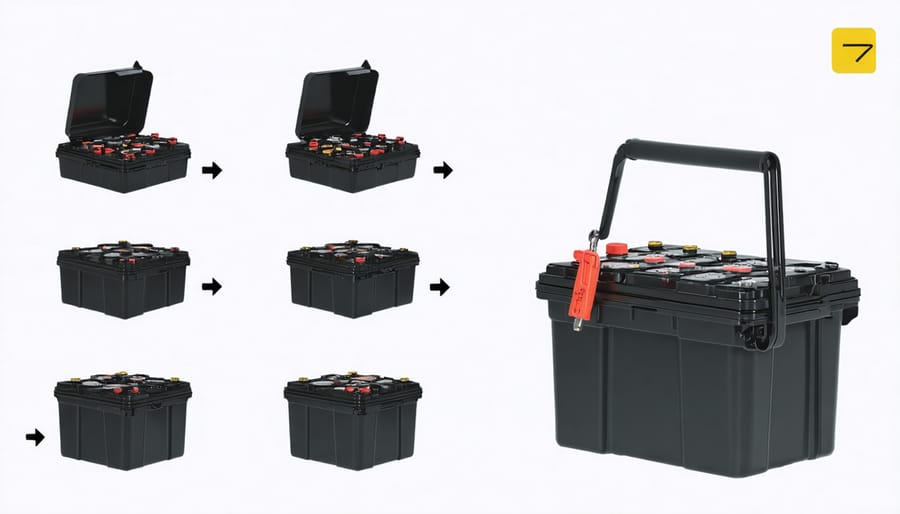
Start by selecting a sturdy, weather-resistant container as your base. A high-quality plastic storage box or toolbox works well, but ensure it’s at least IP65 rated for outdoor use. The box should be large enough to accommodate your batteries with extra space for ventilation and wiring.
Cut ventilation holes in the sides of the box, positioning them away from direct weather exposure. Install mesh screens over these openings to prevent debris and insects from entering while maintaining airflow. Create a slightly angled base inside the box using weather-resistant plywood to help manage any potential moisture.
Install rubber grommets in the holes where cables will enter and exit the box to prevent wire chafing. Mount battery terminals on a raised platform within the box to keep them away from any potential moisture at the bottom. Use industrial-grade velcro or mounting brackets to secure the batteries in place, preventing movement during operation.
Add weatherproof seals around the lid and any access points. Consider installing a small awning or cover above the box if it will be exposed to direct sunlight or precipitation. For monitoring purposes, create a clear panel in the lid or side of the box to view status indicators without opening the enclosure.
Remember to include drainage holes at the lowest points of the box to prevent water accumulation, but ensure they’re protected to maintain the box’s weather resistance rating.
Battery Configuration
When arranging batteries in your smart battery box, proper configuration is crucial for optimal performance and safety. Start by determining whether you need a series or parallel connection based on your voltage requirements. Series connections increase voltage while maintaining the same amperage, while parallel connections increase amperage while maintaining voltage.
For most home solar applications, we recommend using lithium iron phosphate (LiFePO4) batteries arranged in a 48V configuration. This typically requires connecting four 12V batteries in series. Ensure all batteries are of the same type, capacity, and age for best results.
When wiring your batteries, use appropriately sized cables that can handle the maximum current flow. The positive terminal of one battery should connect to the negative terminal of the next battery in series configurations. For parallel connections, connect all positive terminals together and all negative terminals together.
Include temperature sensors between battery cells and maintain adequate spacing for proper ventilation. Install a battery management system (BMS) to monitor individual cell voltages, temperature, and overall system health. The BMS should be positioned where it can effectively communicate with all cells while remaining accessible for maintenance.
Remember to label all connections clearly and create a detailed wiring diagram for future reference. Double-check all connections before closing the battery box, and ensure all terminals are properly insulated to prevent short circuits.
Smart Controls Integration
Modern battery boxes benefit greatly from smart monitoring and control systems, which help maintain optimal performance and extend battery life. Start by installing a battery monitoring system (BMS) that tracks voltage, current, temperature, and state of charge. These systems typically connect to your batteries through dedicated sensing wires and can display real-time data through a digital interface.
For basic control, incorporate a programmable charge controller that manages charging cycles and prevents overcharging. Add a digital voltmeter and ammeter to monitor power flow, and install temperature sensors at key points within the battery box. Many DIY enthusiasts also include a microcontroller, such as an Arduino or Raspberry Pi, to enable smart features like data logging and remote monitoring.
Consider integrating a wireless module to connect your battery box to your home network. This allows you to monitor performance through a smartphone app or web interface. Install automated disconnect switches that can cut power if unsafe conditions are detected. For additional safety, include voltage regulators to maintain stable output and protect connected devices.
Remember to properly insulate all electrical connections and use appropriate gauge wiring for your system’s amperage. Label all components clearly and create a wiring diagram for future reference. Regular calibration of monitoring equipment ensures accurate readings and reliable operation of your smart battery system.
Home Integration Strategies
Solar System Integration
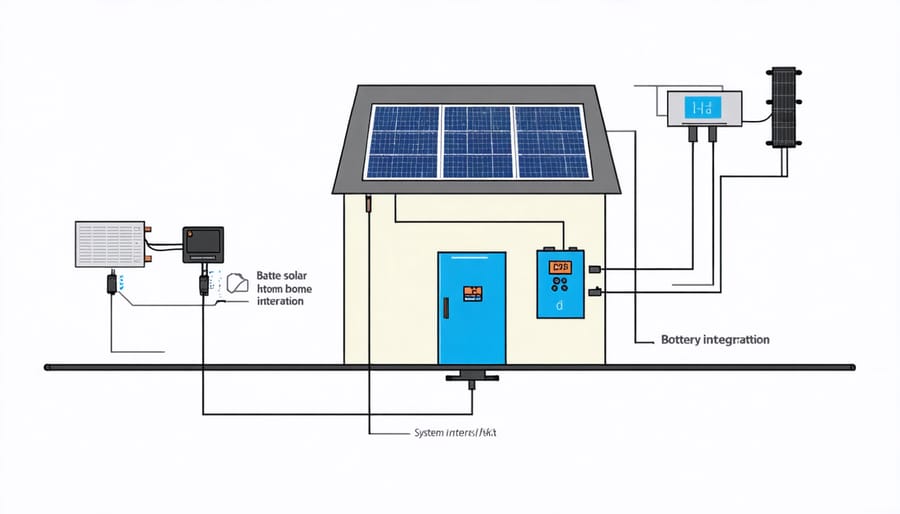
Integrating your DIY smart battery box with an existing solar installation requires careful planning and proper connection strategies. The key to successful solar system integration lies in matching your battery box specifications with your solar array’s output capacity.
Start by identifying your solar system’s voltage and current specifications. Most residential solar installations in Illinois operate at either 24V or 48V DC, and your battery box should match this voltage level. Install a compatible charge controller between your solar panels and the battery box to regulate charging and prevent overcharging.
Your smart battery box should include a bidirectional inverter that can handle both charging from solar panels and discharging to power your home. Modern inverters often come with built-in monitoring capabilities that allow you to track energy flow and system performance through a smartphone app.
For optimal performance, position your battery box in a location that minimizes the distance between your solar panels, inverter, and main electrical panel. This reduces power loss through transmission. Consider installing disconnect switches on both the solar and battery sides for maintenance and safety purposes.
Remember to update your system’s monitoring setup to include the new battery storage capacity. This ensures you can track your energy storage and usage patterns effectively, maximizing the benefits of your solar-plus-storage system.
Smart Home Connection
Integrating your DIY smart battery box with your home’s energy systems enhances its functionality through advanced monitoring and automation capabilities. Modern smart home energy management systems allow you to track power consumption, battery status, and charging cycles in real-time through smartphone apps or web interfaces.
To connect your battery box, install a compatible smart monitoring device that connects to your home’s Wi-Fi network. Popular options include the Home Assistant platform or manufacturer-specific monitoring solutions. These systems can be programmed to automatically switch between grid power and battery power based on peak usage times, helping maximize energy savings.
Consider adding smart plugs or relays to control which appliances draw power from your battery system. This allows you to prioritize essential devices during power outages or high-demand periods. Many systems also integrate with weather forecasting services to optimize charging cycles based on predicted solar production.
For enhanced safety, set up automated alerts for critical conditions like low battery charge, unusual power draws, or temperature fluctuations. This proactive monitoring helps prevent system failures and extends battery life. Remember to regularly update your monitoring software to ensure optimal performance and security of your smart battery system.
Maintenance and Optimization
Regular Maintenance Tasks
Regular maintenance of your smart battery box is essential for optimal performance and longevity. Begin with monthly visual inspections of all connections, ensuring they remain tight and free from corrosion. Clean any dust or debris from the ventilation ports using compressed air or a soft brush, as proper airflow is crucial for temperature regulation.
Check the battery voltage readings quarterly using a multimeter to ensure they align with the manufacturer’s specifications. Monitor the smart display or management system for any error codes or unusual patterns in power consumption. If you notice any irregularities, address them promptly to prevent potential issues.
Inspect the weatherproofing seals every six months, particularly before extreme weather seasons. Replace any deteriorating gaskets or seals to maintain proper protection from moisture and environmental elements. Also, verify that all cable insulation remains intact and shows no signs of wear or damage.
Test the backup systems and alarms annually to ensure they function correctly in case of power failures or emergencies. Update the battery management system software when available, as these updates often include important security patches and performance improvements.
Keep a maintenance log to track readings, repairs, and observations. This documentation helps identify patterns and potential problems before they become serious issues. Remember that while DIY maintenance is important, some technical issues may require professional assessment to ensure safe operation.
Performance Monitoring
Monitoring your DIY smart battery box’s performance is crucial for maintaining optimal efficiency and extending its lifespan. Modern smart monitoring systems provide real-time data on key metrics including voltage levels, charging rates, and power consumption patterns.
Essential monitoring tools include a battery monitor display that shows state of charge, current draw, and temperature readings. Installing a shunt resistor helps accurately measure current flow, while voltage sensors track individual cell performance. Many DIY enthusiasts incorporate Arduino or Raspberry Pi microcontrollers to log data and create custom monitoring dashboards.
To track system efficiency, record daily power input from your solar panels and power output to connected devices. This helps identify potential issues like declining battery capacity or charging inefficiencies. Most monitoring setups can send alerts to your smartphone when parameters fall outside safe ranges.
Keep a maintenance log documenting performance metrics, noting any unusual patterns or degradation over time. This historical data proves invaluable for troubleshooting and optimizing your system. Consider installing a Wi-Fi enabled monitoring module to access performance data remotely and integrate with your existing home automation system.
Building a DIY smart battery box is an achievable project that can enhance your energy independence and storage capabilities. By following proper safety guidelines and incorporating smart monitoring systems, you can create a reliable power storage solution that meets your specific needs. Remember to regularly maintain your battery box, check connections, and monitor performance through your chosen smart system. As technology continues to evolve, consider upgrading your components to improve efficiency and functionality. Whether you’re a homeowner looking to maximize your solar investment or simply seeking backup power solutions, a smart battery box offers a practical and customizable approach to energy storage. Start with a small-scale system and expand as your confidence and needs grow, always prioritizing safety and proper installation practices.
